amis au fil des ans

just a few good friends, sharing adventures in family, arts, and sometimes heavy machinery

Archive for the month “August, 2011”

before and after…

and i know it isn’t much.  but it was.  we dug away and moved so much earth from along the wall to to steps.  so much dirt.  oy.  seriously.  i need compliments on this.  can you see the 18″ wall in the first picture?  NO!  can you in the second?  YES!  we are getting mulch delivered next week and i think i will put in a few more junipers and maybe even a huneysuckle ground cover.  just worried it will overtake our yard.  we also need to grow more grass on the top of the slope and define the grass line some.  maybe add in a landscape border?  that could keep the honeysuckle at bay…

anyway…forward (???) progress is being made!

before:

after:

ever bite off more than you could chew?

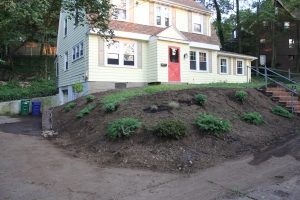
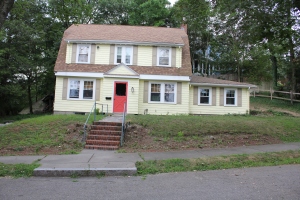
b and i are very good at that.  we have a hate-hate relationship with our yard.  so last week we had a company come and tear out everything in the front yard and take down 4 trees and now we have to do something with it.  but it needs so much work that it sends me into a mild panic attack just thinking about it.  but we have to do something.  we just need the something to be in the low low low low low financial requirement category and the something has to be in line with our master plan.  some pictures to give you a framework:

front before and after:


right side before and after:


back before and after:


master plan includes a new front entrance-way, pergola, play structure, garden, flagstone patio around the house and off of the sunroom, and a fence.

i think the steps for this year will be as follows…

1.   excavate more of the land in the back right of the house to expose more ledge (rock).  both for 2 reasons.  1:  we like it.  2:  it will act as a natural retaining wall and can (hopefully) save money by using what is natural versus creating something man-made.  we also need to address some drainage issues since during the rainstorm yesterday it was discovered that we have a waterfall coming through our basement window.  sigh.

2.  level the front, right, and back yards.  the front yard will remain on a hill but we need to level the top part so we can put a fence at the top of the hill and do a low maintenance mulch garden down the slope.  b wants to rework the steps and path to come up by the driveway as opposed to the sidewalk.  we also want to level the area to the right so we can put a play structure for the girls.  the back left we also want to level so we can put up a pergola for an outdoor sitting area.  did i mention we also want to remove all the vines and ivy on the ledge?

3.  update the sprinkler system.

4.  lay sod and spread mulch.

5.  install a fence.  (note:  this is a pipe dream as my budget is $0 and clearly the above items will not be free.  but…a girl can dream.)

next year we will get the play structure for the kids, do some plantings, build window boxes, and hopefully get a couple raised garden beds.  main concern with the garden is that it will have to go in the front yard as that is where the sun hits.  i think as long as we have a good fence that should be fine….?

the following year we will tackle the new front entrance-way, pergola, and patios.

totally doable…right?

thank you very much, mr. roboto

today’s craft wasn’t exactly a challenge unless you count sewing with increasing back pain thanks to running nearly 8 miles in the past 24 hours.  however, 6 bibs and burp cloths later i’m happy to report that i did use my sewing machine this weekend!  the theme of the day is robots, and i made these for a few friends who are due to have boys in sept.

birdie detail

i photo copied a bird from this fabric and enlarged it by like 200%, then ironed it onto some heat bond and wala 🙂


fabric reporting for duty

here is the fabric i selected for natalie’s baby gift. i’m going to attempt my first rag quilt and make some burps and bibs as well. sarah, thanks for the rag tutorial! can’t wait to give it a shot. not sure if i will use all these fabrics, so we’ll see where i end up. wish me luck!

updated cafe curtains


don’t you love when you set out to do something crafty and it ends up taking a totally different direction?  i had big plans for making my own cafe curtains for the kitchen and making coordinating cushions for the hookah table (yes, you read that correctly).  so what went wrong?  well, i headed off to bb&b for the curtain rods and found these great panels – the perfect length, the perfect color…one thing led to another…i bought a pair, brought them home expecting to return them the next day.  wouldn’t you know they are exactly the right size, let in exactly the right light, and look just about perfect all on their own.  sheesh!  after i set up my sewing machine and everything.  in this rare example of a project taking about 20% as much time as originally estimated (afterall, i did have to clean up all the packaging materials), i’m happy to say tah-dah!  instant satisfaction.  yippee!

drip drip spray

zinnia's are an easy, pretty flower to grow by seed; highly recommend!

here in sunny (too sunny) florida we have two vegetable growing seasons (jan – july), (aug – dec).  this is both good and bad, as you can imagine.  you may recall this year my wonderfully handy hubby made me two large garden planters for our backyard, raised about 2′ off the ground to hopefully keep the pups from trampling our crops.  unfortunately we haven’t exactly solved that problem, but we’ll save that for another day.

gardening in florida can be quite easy, and if success was measured in cucumbers and peppers than i’d say we had an incredibly successful first half of the year.  that said, we are now in break mode, waiting for cooler temps and starting new seeds.

one of our only challenges with gardening is keeping the beds watered.  we’ve been playing around with a soaker hose, but i didn’t like that it has continuous holes because we have about a 2′ gap between our two beds, causing us to lose much of the water on the sidewalk.  thanks to my hubby’s healthy addiction to harbor freight, he came home one day with a do-it-yourself drip irrigation system for…wait for it….a whopping $6!

now, i realize that for $6 you get what you pay for – we have no expectations of this kit at this point, but thought we’d give it a whirl before investing much more into a professional kit.

little less drip, little more spray i'd say

assembly was quite simple; run the rubber tubing from the faucet to the planters, cut the tube wherever you want water and insert the little spray nozzle, attach the rest of the tubing and repeat!  in the end you have a tube that only releases water in the designated spot that you want it, and you waste nothing.  whoo hoo!  i ran it a couple of times to get the spray exactly where i want it, and we seem to be all set.

we have been using a timer for over a year now, so we just hooked up the new drip system to it and now it’s set to run every day for 10 minutes.  once the weather cools, we’ll switch it to every other day or every 3 days, but for now water is a necessity.

of course i couldn’t make a post about the garden without showing off my super cute garden markers, purchased last year at the local art fair!  these are awesome since they were cooked in the pottery kiln at whatever hundreds of degrees are required so they can handle our heat no problem.  love them!

nursery update

i made a curtain for the nursery because it has been wretched hot here and her poor room has been like a sauna. to make the birds, i photo copied a bird in the fabric pattern and blew it up.

and drumroll pleeeeaasse…here is the awesome bumper sarah made! (sarah, sorry it has taken so long to post)

fergarella…this one’s for you!

a finished pouf.  (and just to clarify…the pouf is not for you but the picture of the pouf is…)

picture project update

here is an update on the picture project. i feel like i will never finish! i did the wall by the front door out of complete inspiration by both of you. thanks for sharing! i knew i wanted to do some wedding photos there, but hadn’t decided how.


and here is the very in progress stair wall. i have missing spaces, things i want to paint. pictures that don’t belong (i havent filled most frames and if it has a picture…esp if it is sideways :), i am replacing it). anyway…its a hodge podge…my masterpiece in progress. it still needs lots of love.


Post Navigation